pH Sensor
See THIS LINK for pH Sensor details & Code.
Test Sensor
Test the sample code provided in the above link.
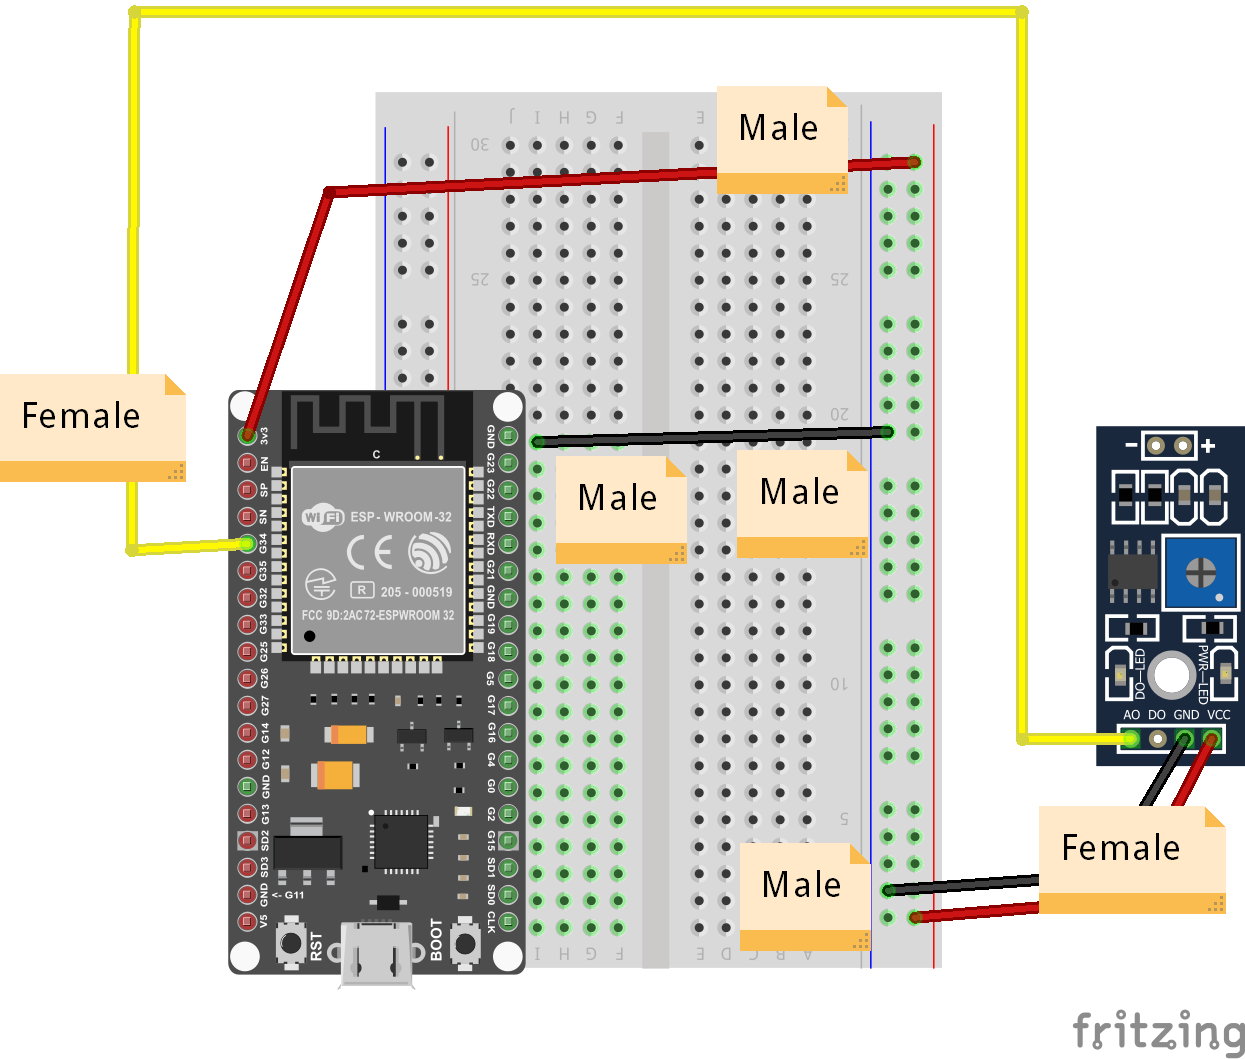
For connection to the IoT microcontroller, you can use the same connection diagram as in the Planter Project in this pack:

Just replace the hygrometer board with the pH sensor board.
In the code provided, replace A0 with pin 34 and the LED pin with 2 as follows:
#define SensorPin A0            //pH meter Analog output to Arduino Analog Input 0
#define Offset 0.00            //deviation compensate
#define LED 13
should be:
#define SensorPin 34            //pH meter Analog output to Arduino Analog Input 0
#define Offset 0.00            //deviation compensate
#define LED 2
The rest should be similar.
Finally, when you are ready to send the info out to Blynk, follow the Planter project, and use the exact same code to push out the values to your handheld device, like so:
#define BLYNK_PRINT Serial
#include <BlynkSimpleEsp32.h>

// See Auth Token in email from Blynk...
char auth[] = "YourAuthToken";

// Your WiFi credentials.
// Set password to "" for open networks.
char ssid[] = "YourNetworkName";
char pass[] = "YourPassword";

BLYNK_READ(V0) {
  Blynk.virtualWrite(V0, 4095 - analogRead(34));
}

void setup() {
  // Debug console
  Serial.begin(9600);
  pinMode(34, INPUT);

  Blynk.begin(auth, ssid, pass, "a9i.sg", 8081);
}

void loop() {
  Blynk.run();
}
